Map Navigation and Display
There are multiple ways to navigate NationalMap's map view. Use whichever method you prefer.
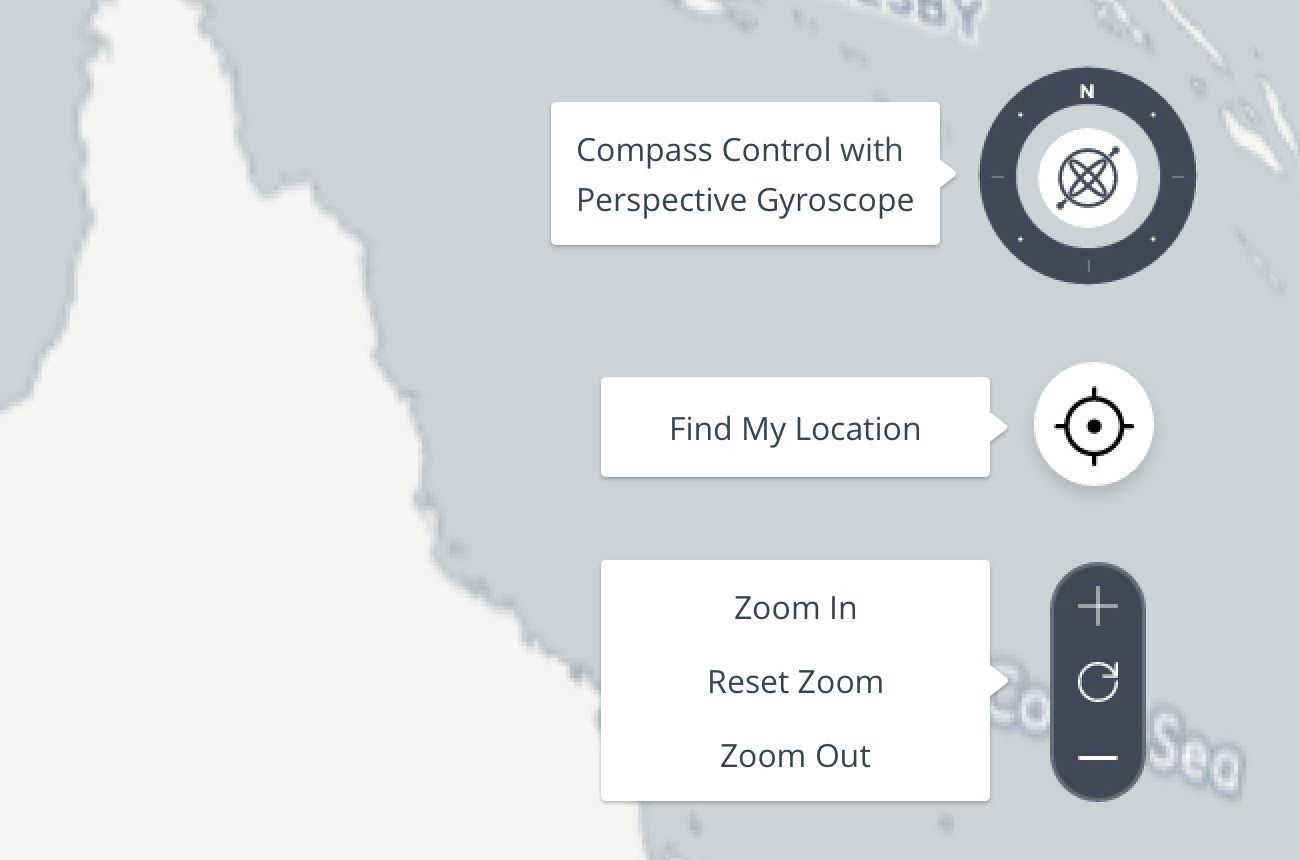
Hint: Mouse over the Compass Control (pictured below) to see help on its use.
Zooming
Move your mouse pointer over the map and use the scroll wheel to zoom in or out. The location at the centre of the map display is the centre of the zooming.
Right-click and drag upwards or downwards over the map to zoom about the centre point (dragging left or right has no effect).
Click on the zoom control (pictured above) to zoom in or out quickly by a set amount.
Panning
Click anywhere on the map and drag it to the required location.
Return to Australia View
Click the reset icon in the center of the zoom control (pictured above).
(Note that pressing the F5 key on Windows or Command + R on Mac OS will reload the entire NationalMap web page. This will result in a reset which will show the whole of Australia, but it also results in the total loss of all your context information from the current session, which includes display information and selected Data Sets. It is not recommended unless you are experiencing problems.)
Rotate the Map
Use the Compass Control (pictured above) to rotate the map so North is no longer at the top. Click on the “gyroscope” in the centre of the Compass Control and drag slowly to the left or right to rotate the map clockwise or anti-clockwise respectively. The further you drag, the faster it rotates. Release the mouse button when you reach the desired rotation.
Click on the North Point or outer ring of the Compass Control (pictured above) and drag it around to set the desired rotation directly.
Control + left-click and drag left or right over the map to rotate the view about the centre (on Windows systems you can also use Middle-click and drag).
Perspective View
Click on the “gyroscope” in the centre of the Compass Control (picture above) and drag slowly upwards to tilt the view into a Perspective View. Drag downwards to tilt the view back to vertical. The further you drag, the faster it tilts. Release the mouse button when you reach the desired view.
Control + left-click and drag upwards or downwards over the map to enter or adjust the perspective view. (On Windows systems you can also use Middle-click + drag.)
When you are in Perspective View, Control + left-click and drag left or right over the map to “orbit” around the centre of the view. You can also click and drag left or right over the “gyroscope” at the centre of the Compass Control to orbit about the centre of the view.
Double-click the “gyroscope” in the centre of the Compass Control to return the view quickly to a vertical view with North to the top at the current location and scale.
Dragging to Pan and using the Mouse Wheel to zoom still work while showing a Perspective View.
Even the topography and road maps can be viewed in perspective.
You can’t simulate looking from under the ground because the system always keeps the “camera position” above the earth’s surface, but you can create a view which is looking only at the sky. Tilt back downwards to recover.
Hint: In Australia, Cradle Mountain and Katoomba are good places to use for experimenting with Perspective View. Use the search bar to locate them. (Other very high relief areas like the Grand Canyon or Mount Everest - not the ones in NSW - are also really cool!)
Changing the Base Map
Click on the Maps button to show the Base Map Dialog (pictured below) for changing the base map.
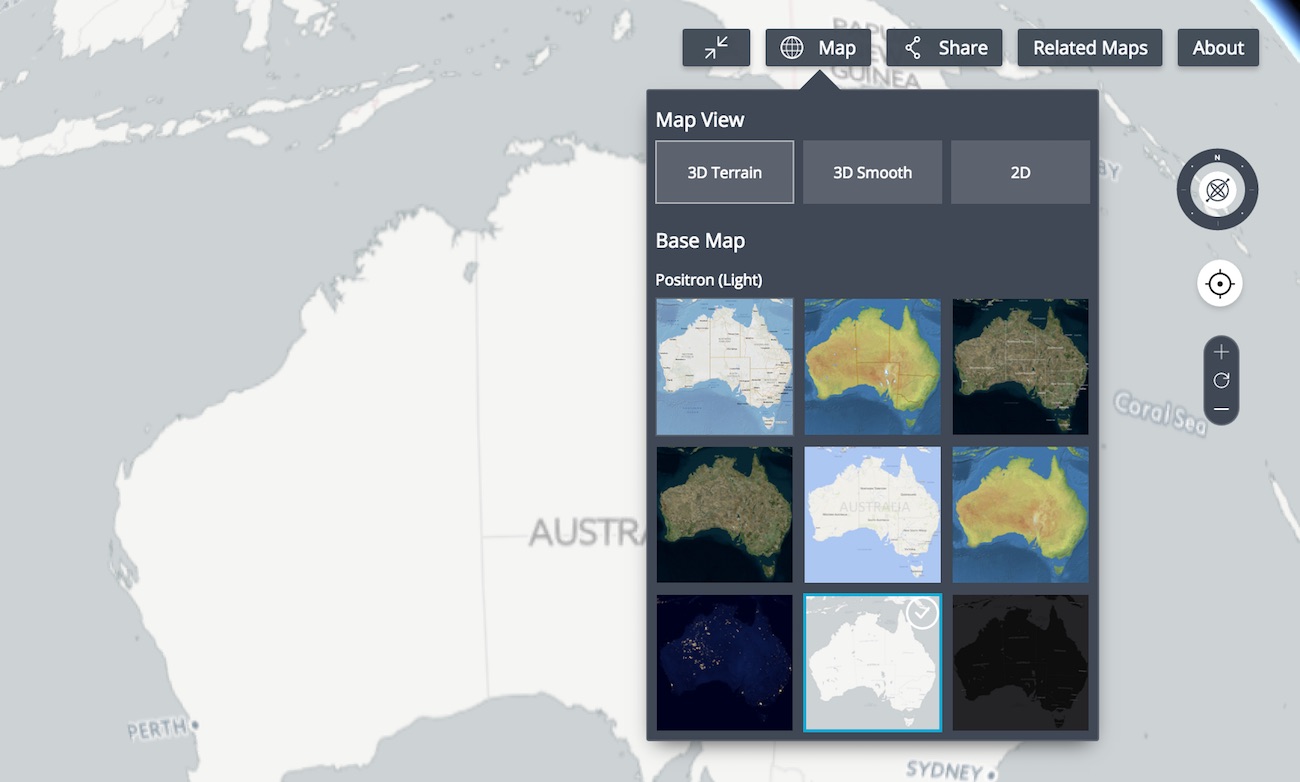
- Select 2D to show a vertical map view with north to the top. The Compass Control will not be displayed and Perspective View cannot be enabled.
- Select 3D Smooth to show a Perspective View which has no elevation change. The maps or images are draped over a smooth globe.
- Select 3D Terrain to show a Perspective View which shows the elevation changes in the terrain. 3D Smooth and 3D Terrain will look almost the same unless you are using Perspective View. Note: 3D Terrain view may give the same result as 3D Smooth or may not work at all on some computers with older graphic cards or older web browser versions.
- Click on one of the Base map thumbnails to select the type of map to view. Mouse over the thumbnails to see a hint on what they are. NASA Black Marble, Australian Hydrography and Natural Earth II may show as completely one colour if you are zoomed in too far. Try these ones on a zoomed out view first.
Close the dialog by clicking the X at the top right or clicking again on the Base Maps button.